DIY Towing Hitch Installation: A Beginner's Guide

Joel Phillips • February 4, 2025

Beginner’s Guide to Installing a Towing Hitch: DIY Made Simple

How to install a towing hitch on your vehicle doesn't have to be intimidating. If you're an adventurous soul in Denver, Colorado, or a pickup truck driver in Aurora planning your next camping gear haul, a solid towing hitch is your vehicle's best wingman. Here's a quick rundown:


  1. Check your vehicle's towing capacity.
  2. Choose the right hitch class.
  3. Gather essential tools: socket set, torque wrench, safety glasses.
  4. Prepare your vehicle and workspace.
  5. Mount and secure the hitch.
  6. Perform safety checks.


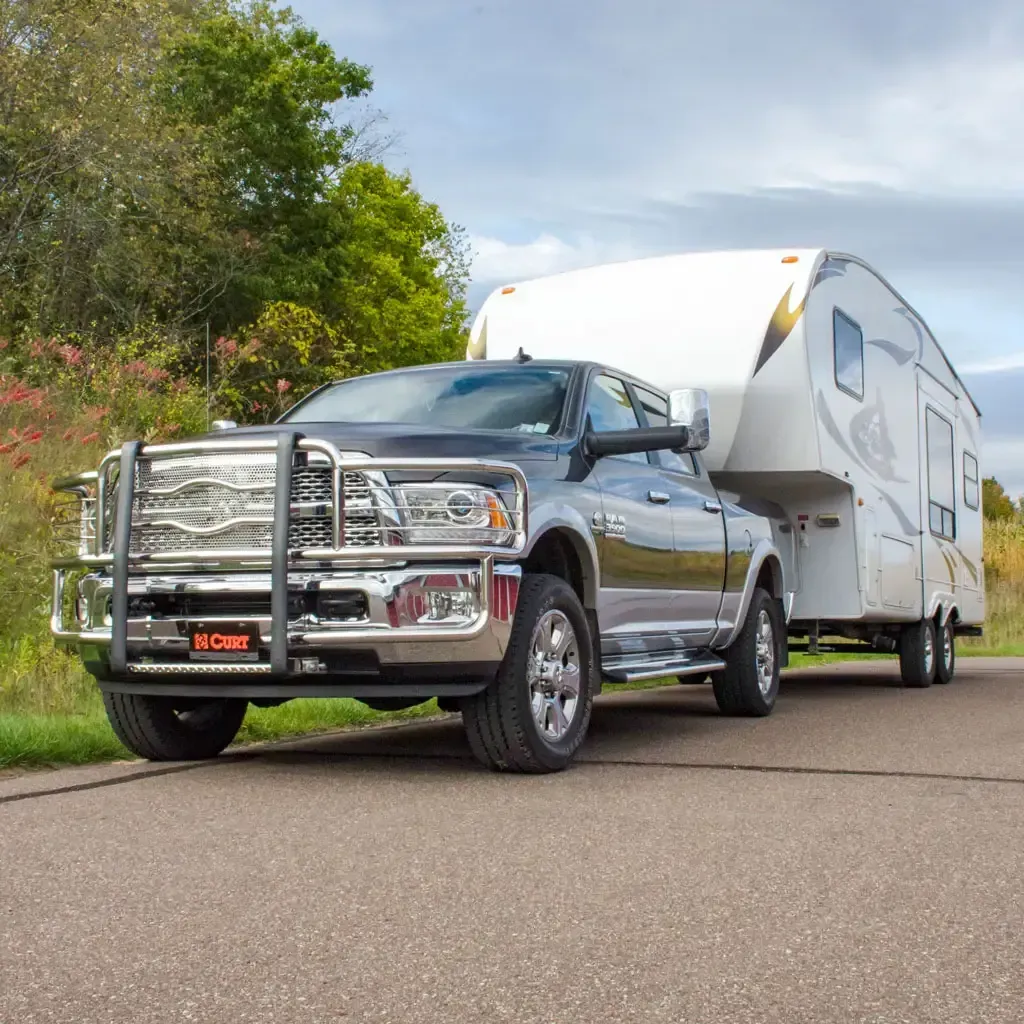
Setting up a towing hitch isn't just about bolting metal to your car; it's about gearing up for outdoor trips in the Rockies or a breezy trip to Chatfield State Park. This DIY project lets you confidently handle camping trailers, bike racks, and more, changing your vehicle into a reliable trip companion.


As the founder of The Hitch Corner, I, Harold Kiefer, have spent over 34 years helping outdoor enthusiasts like you install the perfect towing hitch. My passion and expertise ensure you get the right hitch for your needs. Join me as we dig into the steps of installing a towing hitch!


Tools and Materials Needed

Before you dive into your DIY towing hitch installation, it's crucial to gather all the necessary tools and materials. Having everything on hand will make the process smoother and more efficient, especially if you're prepping for a weekend trip in the beautiful Colorado outdoors.


Essential Tools

  1. Socket Set: A good socket set is your best friend. You'll need it to tighten bolts securely. A 1/2-inch set is recommended, but a 3/8-inch set can work if that's what you have.
  2. Torque Wrench: This tool ensures you apply the correct torque to the bolts, keeping the hitch secure. Always follow the manufacturer's torque specifications for safety.
  3. Safety Glasses: Protect your eyes from debris while working underneath your vehicle. Safety first!
  4. Jack and Jack Stands: These are essential for lifting your vehicle safely, giving you clear access to the undercarriage.
  5. Wire Brush: Use this to clean the mounting surfaces, removing rust and debris for a smooth installation.
  6. Drill and Drill Bits: If your vehicle frame requires drilling for installation, a high-speed drill with appropriate bits will be necessary.
  7. Measuring Tape and Marking Pen: Handy for marking drilling positions if needed.


Materials

  • Hitch Kit: This usually includes the hitch itself, mounting hardware (bolts, washers), and installation instructions. Ensure it's compatible with your vehicle's make and model.
  • Lubricant: Useful for cleaning pre-threaded holes and easing the installation process.


Safety Equipment

  • Work Gloves: Protects your hands from cuts and scrapes while handling tools and materials.
  • Chalks: Secure your vehicle's wheels to prevent any movement while it's jacked up.


Installation Instructions

Each hitch comes with specific installation instructions. It's vital to follow these closely to ensure a safe and secure fit. Here's a brief overview:


  1. Prepare Your Vehicle: Start by chocking the wheels and raising the vehicle with jack stands. Remove any obstructions like spare tires or heat shields.
  2. Mount the Hitch: Position the hitch under your vehicle, aligning it with the pre-drilled holes. If needed, drill new holes as per the instructions.
  3. Secure the Hitch: Insert the bolts and tighten them with a socket set. Finally, use a torque wrench to ensure they meet the manufacturer's specifications.


By gathering these tools and materials, you'll be ready to tackle the installation with confidence. If you're unsure about any step, our team at The Hitch Corner in locations like Littleton and Aurora, CO, is here to help with expert advice and professional services. Whether you're gearing up for a camping trip to the Rockies or a day out at Chatfield State Park, having the right hitch installed will set you up for countless trips.


How to Install a Towing Hitch

Installing a towing hitch might seem daunting at first, but with the right tools and a bit of patience, you can do it yourself. Follow these steps to ensure a successful installation and get ready for your next trip, whether it's hauling a trailer to the Rocky Mountains or taking your boat to Chatfield State Park.


Step 1: Prepare Your Vehicle

Safety First: Before anything else, chock the wheels to prevent your vehicle from rolling. This is crucial for your safety.


  1. Lift Your Vehicle: Use a jack to lift your vehicle and secure it with jack stands. This gives you the space needed to work comfortably underneath.
  2. Remove Obstructions: Clear any obstacles from the installation area. This might mean removing the spare tire or heat shields. Doing so will make it easier to access the mounting points.
  3. Clean the Surface: Use a wire brush to clean the mounting surface on the vehicle's frame. Removing rust and debris ensures a secure fit for your hitch.


Step 2: Mount and Secure the Hitch

Positioning the Hitch: Now it’s time to get the hitch in place.


  1. Align the Hitch: Position the hitch under your vehicle, aligning it with the pre-drilled holes in the frame. If your vehicle requires new holes, use a drill to make them as per the manufacturer's instructions.
  2. Fasten the Bolts: Insert the bolts through the hitch and into the vehicle frame. Finger-tighten them first to ensure everything lines up correctly.
  3. Torque Specifications: Once aligned, use a socket set to tighten the bolts. Follow up with a torque wrench to apply the correct torque as specified by the manufacturer. This step is vital for a secure installation.


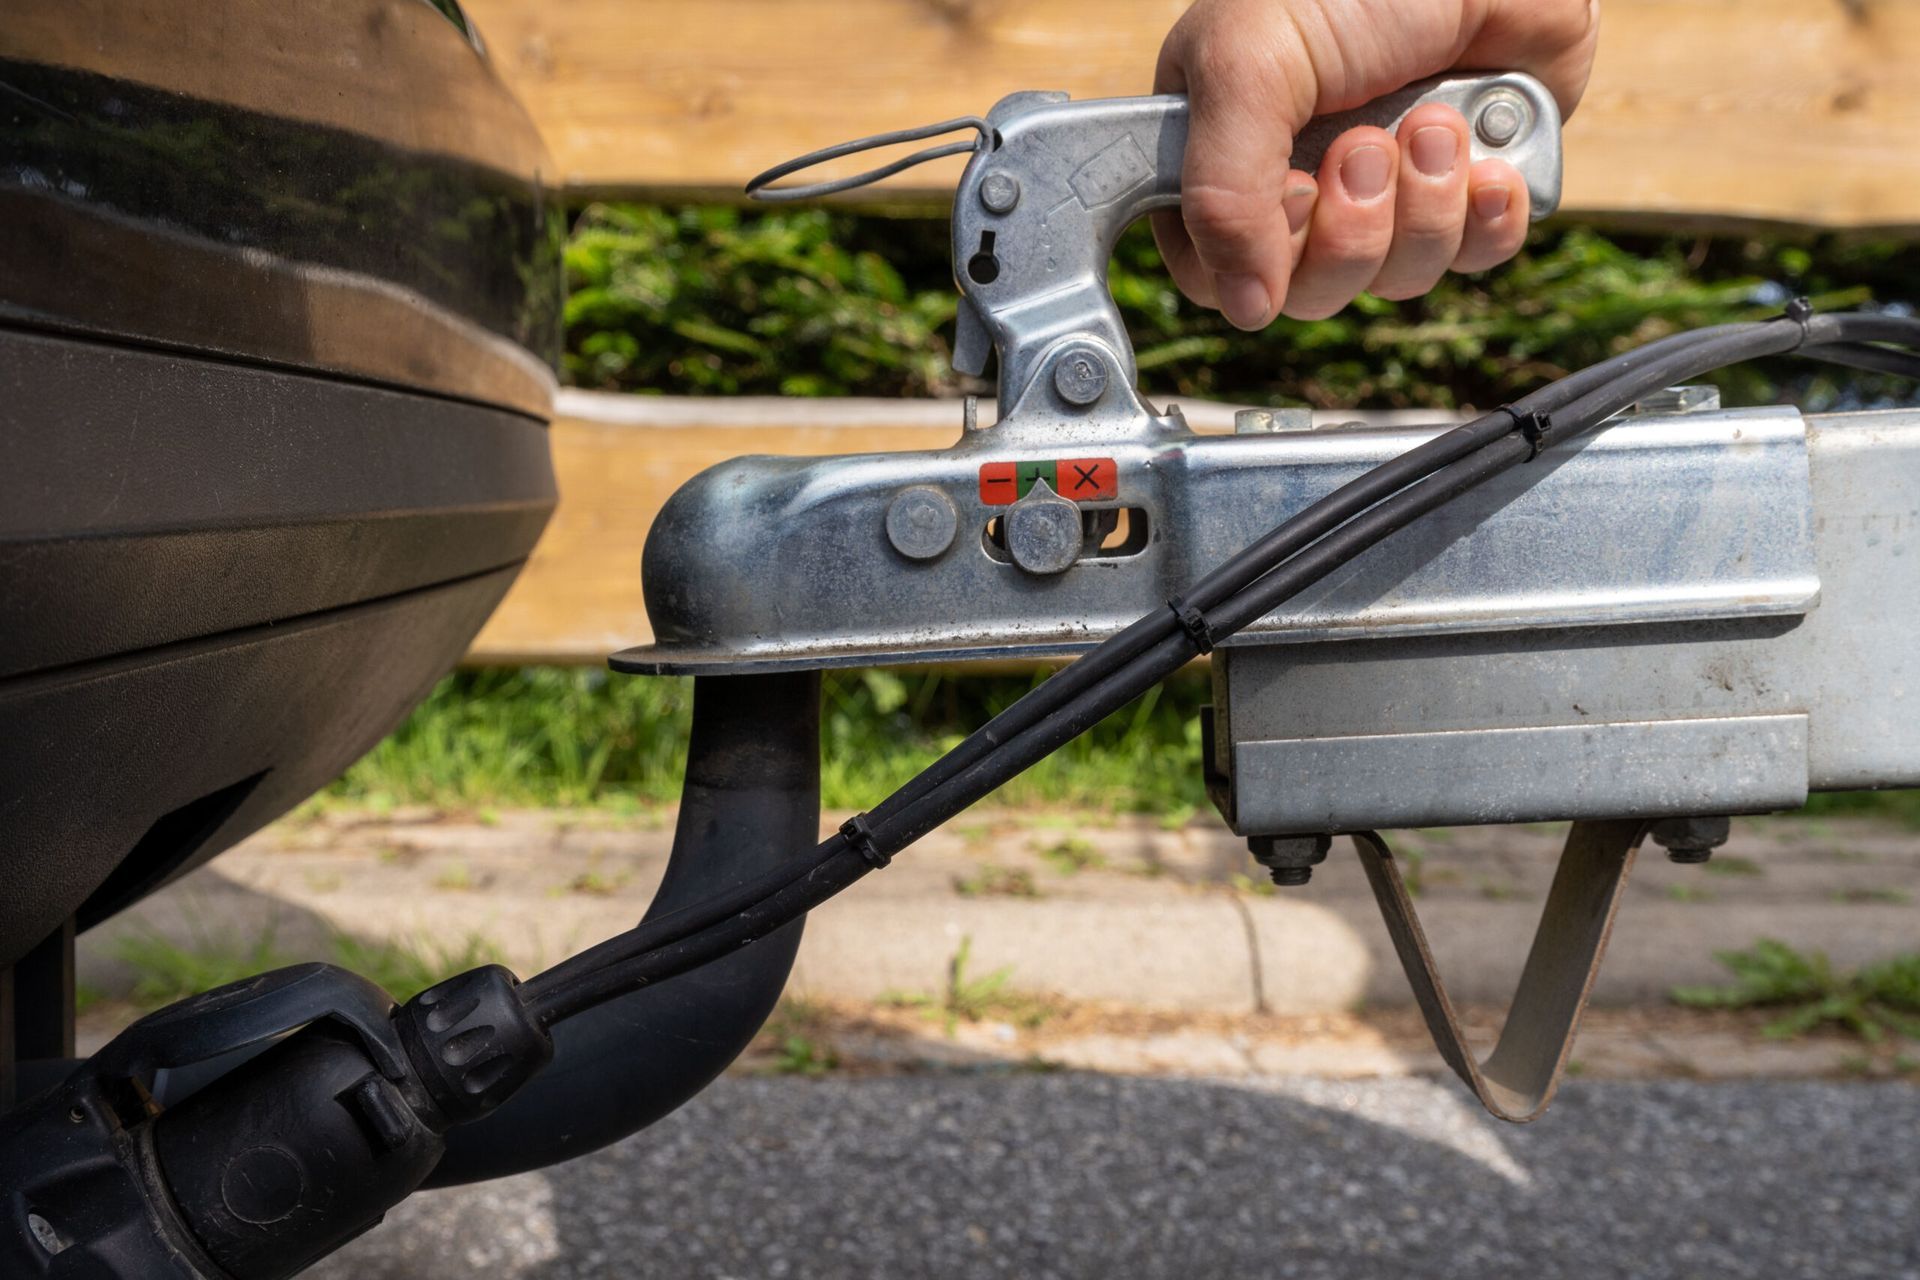
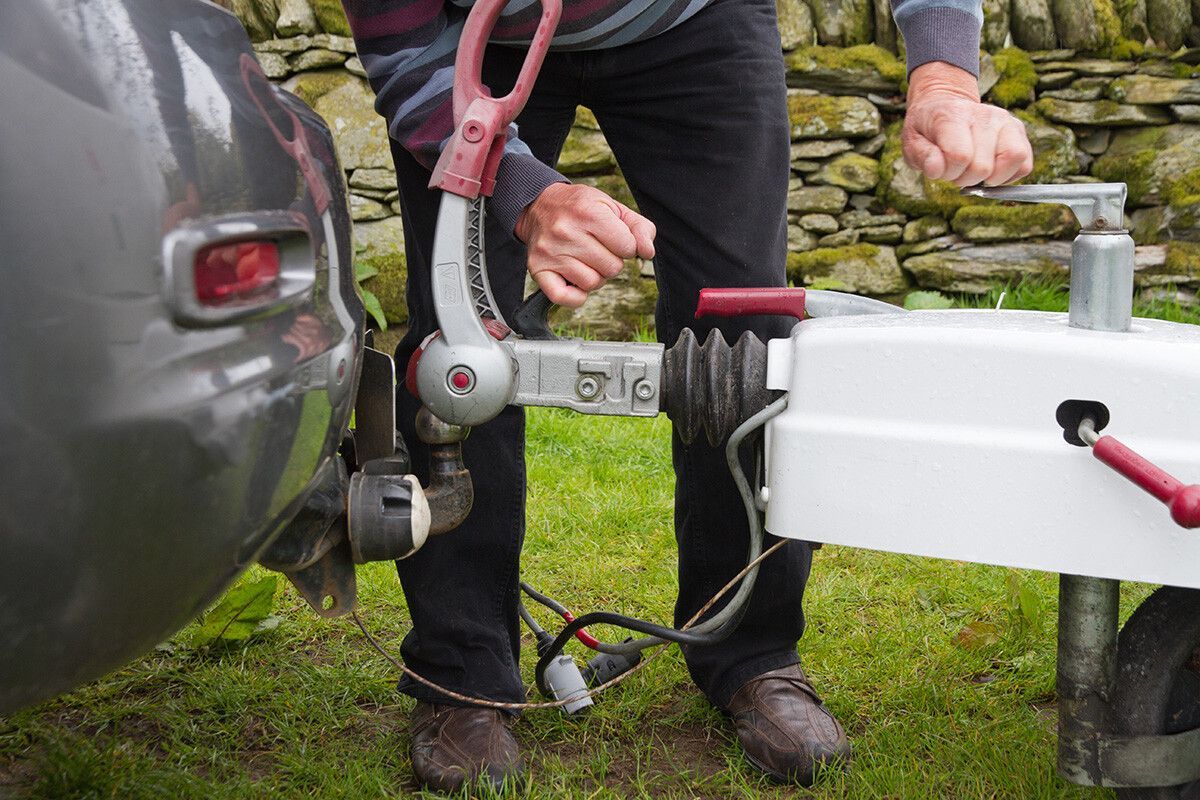
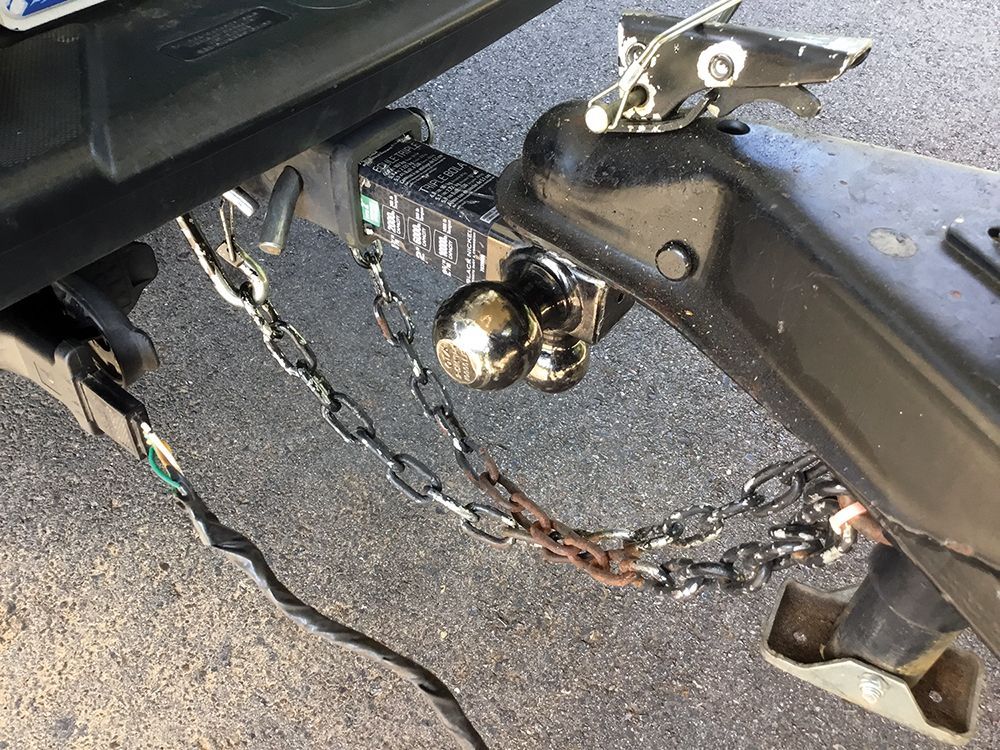
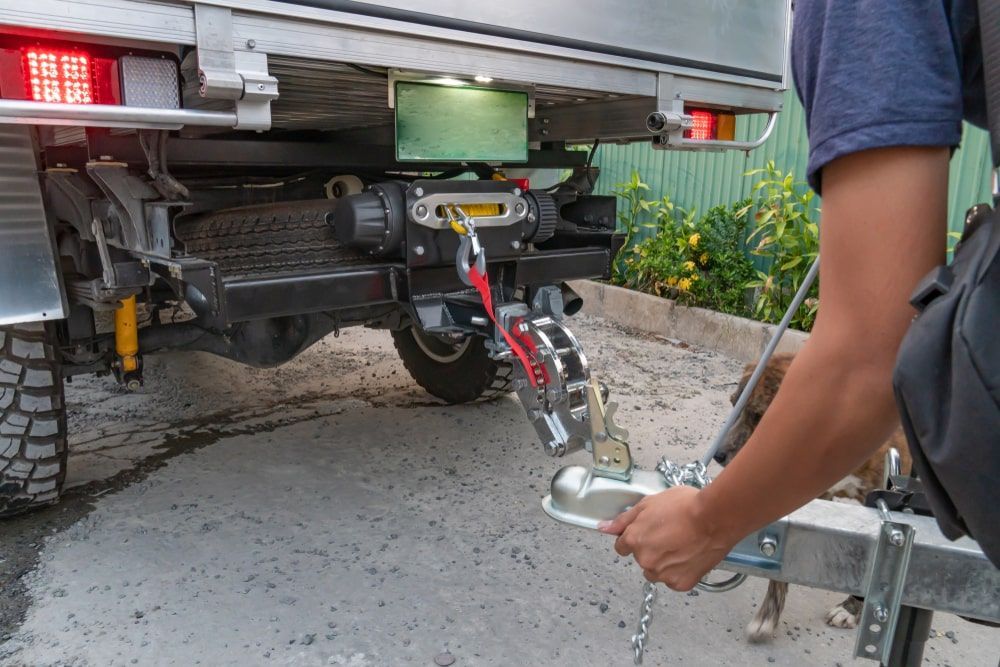
Step 3: Install the Hitch Ball and Draw Bar

Final Touches: With the hitch secured, it's time to add the hitch ball and draw bar.


  1. Attach the Ball Mount: Insert the ball mount into the receiver tube of the hitch. Align the holes for the hitch pin.
  2. Secure with a Hitch Pin: Insert the hitch pin through the aligned holes and secure it with a clip. This keeps the ball mount in place.
  3. Connect the Wiring Harness: If your hitch includes integrated wiring, connect the wiring harness to ensure your trailer's lights work properly. This may involve connecting brake lights and turn signals. If you're not comfortable with wiring, consider watching a how-to video or consulting a professional.


By following these steps, you'll have a reliable towing hitch installed, ready to handle your next big haul. For those in the Denver area, The Hitch Corner offers same-day installation services at several locations, including Littleton and Aurora, to ensure you're road-ready in no time. If you need more guidance or prefer professional installation, don't hesitate to reach out to our expert team.


Next, let’s dive into choosing the right trailer hitch for your vehicle and towing needs.


Choosing the Right Trailer Hitch

Selecting the right trailer hitch for your vehicle is essential for safe and efficient towing. The key factors to consider are hitch classes, towing capacity, and vehicle compatibility. Let’s break these down.


Hitch Classes

Trailer hitches are categorized into five classes, ranging from Class I to Class V. Each class is designed to handle different weight limits:


  • Class I: Suitable for light-duty towing, like bike racks or small cargo carriers. Typically used on compact cars, with a weight capacity of up to 2,000 lbs.
  • Class II: Ideal for mid-sized vehicles towing small trailers or boats. Supports up to 3,500 lbs.
  • Class III: Commonly used on SUVs and full-sized cars, perfect for medium trailers. Handles up to 8,000 lbs.
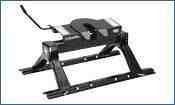
  • Class IV: Designed for larger SUVs and trucks, suitable for heavy-duty towing like large boats or campers, with a capacity of up to 10,000 lbs.
  • Class V: Best for heavy-duty trucks, supporting up to 20,000 lbs. Often used for commercial or agricultural purposes.


Choosing the right class ensures your vehicle can handle the weight safely.


Towing Capacity

Before purchasing a hitch, it's crucial to know your vehicle's towing capacity. This information is usually found in the vehicle's manual or by contacting your dealership.


Pro Tip: Always choose a hitch that matches or exceeds your vehicle's towing capacity. For example, if your car's limit is 5,000 lbs, opt for a hitch that supports at least that weight. Never exceed your vehicle's towing capacity, as it can lead to dangerous driving conditions and vehicle damage.


Vehicle Compatibility

Not every hitch fits every vehicle. Compatibility depends on your vehicle's make, model, and year.


  • Check the Fit: Ensure the hitch is designed for your specific vehicle. Some vehicles, like pickup trucks, might come with a pre-installed hitch, while others may require custom fitting.
  • Consider Usage: Think about what you'll be towing. If you're planning frequent trips to the Rockies or hauling equipment to local events like the Boulder Farmers Market, make sure your hitch can handle the terrain and load.
  • Consult Experts: The Hitch Corner team, with over 20 years of experience in the Littleton, CO area, can assist in choosing the best hitch for your needs, ensuring both safety and performance.


By understanding hitch classes, towing capacity, and vehicle compatibility, you can confidently choose the right trailer hitch. Whether you're preparing for a weekend getaway to Cherry Creek State Park or hauling gear across the Denver area, having the right hitch makes all the difference.


Next, we’ll answer some frequently asked questions about towing hitch installation to help you make informed decisions.


Frequently Asked Questions about Towing Hitch Installation


Can I install a tow hitch myself?

Yes, you can install a tow hitch yourself, especially if you're comfortable with basic tools and have some DIY experience. Most installations require a socket set, torque wrench, and jack stands. For certain vehicles, you might also need a drill and wire brush. Always refer to the hitch's instruction manual and ensure you have the required tools before starting.


If you're in the Denver area, consider stopping by The Hitch Corner for advice. With over 20 years of experience, our team can guide you through the process or offer professional installation services.


How much does it cost to install a tow hitch?

The cost of installing a tow hitch can vary widely. DIY installations are generally cheaper, mainly requiring the purchase of the hitch and any additional tools you may not already have. Professionally installed hitches can range from $50 to over $250, depending on the complexity and labor rates in your area.


Factors influencing cost include the type of hitch, vehicle model, and whether additional modifications are necessary. For local residents, The Hitch Corner offers competitive pricing and expert installation services across multiple Colorado locations, including Aurora and Lakewood.


Can you add a towing hitch to any car?

In most cases, yes, you can add a towing hitch to a wide range of vehicles. However, compatibility depends on your vehicle's make, model, and year. Some cars are not designed for towing heavy loads, so check your vehicle's towing capacity first.


Hitches come in various types, from bumper hitches suitable for SUVs and minivans to heavy-duty options for trucks. Our team at The Hitch Corner can help determine the right hitch for your vehicle. Whether you're in Boulder or Westminster, CO, we're here to ensure your hitch fits perfectly and meets your towing needs.


For more detailed guidance, visit our store or contact us directly. Our experts are ready to help you find the perfect hitch for your vehicle and lifestyle.


Conclusion

Choosing the right towing hitch and ensuring it's installed correctly is crucial for safe and effective towing. At The Hitch Corner, we take pride in offering professional installation services backed by over 50 years of experience. Our team of experts is dedicated to providing you with the best advice and solutions custom to your specific needs.


We understand that the thought of a DIY installation might be appealing for some, but if you're unsure or prefer a hassle-free experience, our professional services are here to help. Our skilled technicians ensure that every hitch is installed with precision, adhering to the highest safety standards. Plus, with our lifetime warranty and installation guarantee, you can tow with confidence knowing that your hitch is in capable hands.


Whether you're planning to explore the stunning landscapes of Colorado or simply need a reliable hitch for everyday use, The Hitch Corner is your go-to destination. With locations across Metro Denver, including Littleton, Aurora, and Lakewood, we're conveniently situated to serve you wherever you are.


For those in the Denver area, stop by our store or give us a call to discuss your towing needs. Our customer service team is always ready to provide expert advice and help you choose the right hitch for your vehicle. Visit our Trailer Hitches page to learn more about our offerings and how we can assist you in achieving a seamless towing experience.


Whether you're a seasoned tower or new to hitches, The Hitch Corner is here to ensure you have the support and expertise you need. Reach out to us today and find why we're Denver's trusted authority in towing solutions.

By Harold Kiefer April 14, 2026
Before you load up the camper, hook up the boat, or strap down the ATVs — read this. It could save your life on Colorado's most dangerous roads. There's nothing quite like a Colorado summer. The smell of pine trees in the morning air. A glassy mountain lake waiting for your boat. A campsite so far from the city that the only lights you see at night are stars. Millions of Colorado families load up their trailers every year and head for the hills - to Rocky Mountain National Park, Dillon Reservoir, Steamboat Springs, Pagosa Springs, and hundreds of other incredible destinations tucked into the Rockies. But here's what most of those drivers don't think about until it's too late: The road to those destinations is one of the most demanding towing environments in the entire United States. We're talking about I-70 mountain grades that drop 6-7% for miles at a stretch. High-altitude passes like Vail Pass, Eisenhower Tunnel, and Wolf Creek Pass where thin air robs your engine of power. Sudden afternoon thunderstorms that turn highways into rivers. Tight switchbacks where an unbalanced trailer can pull your rear end into oncoming traffic in a fraction of a second. Colorado doesn't forgive towing mistakes. At Hitch Corner in Littleton, we've seen firsthand what happens when drivers hit those mountain roads with the wrong hitch, a faulty wiring harness, or an improperly loaded trailer. We've had customers come in shaken after near-misses on US-285. We've inspected vehicles that were one mountain pass away from a catastrophic failure. And almost every single time, the problem was completely preventable. This guide is our way of making sure that doesn't happen to you. Why Colorado Is Different - And Why It Matters for Towing Most towing guides are written for flat, straight highway driving. Attach your trailer, check your mirrors, and cruise at 65 mph on a Kansas interstate. Simple enough. Colorado is not Kansas. Here's what makes towing in the Rockies uniquely challenging: The Grades Are Relentless The stretch of I-70 between Denver and Vail is famous for good reason. Westbound, you climb over 3,000 feet in about 60 miles. Eastbound, you descend those same 3,000 feet - and that's where trailers become dangerous. On a sustained downhill grade with a loaded trailer, your brakes work harder than they ever would on flat ground. Without a properly installed brake controller and functioning trailer brakes, you're asking your tow vehicle's brakes alone to control thousands of extra pounds pushing you downhill. That's not a towing challenge. That's a physics problem with very bad potential outcomes. Weather Changes in Minutes You can leave Littleton on a sunny 75-degree morning and hit a full whiteout blizzard by the time you reach the Eisenhower Tunnel - even in June. Wet roads, reduced visibility, and crosswinds dramatically increase the risk of trailer sway. And trailer sway on a mountain pass is one of the most terrifying situations a driver can face. Altitude Affects Your Engine At 11,000 feet, your engine produces roughly 25–30% less power than it does at Denver's elevation. That means your tow vehicle is working significantly harder to pull the same load. If your hitch and weight distribution setup isn't dialed in correctly, the extra strain can accelerate wear, overheat your transmission, and reduce your vehicle's braking effectiveness. The Roads Are Unforgiving Tight canyon roads with no shoulder. Steep drop-offs with minimal guardrails. Sharp corners with limited sight lines. A trailer that's slightly off-balance on a flat Kansas highway might be perfectly manageable. That same trailer on a hairpin turn above Glenwood Canyon is a completely different story. The 5 Most Dangerous Towing Mistakes We See at Hitch Corner We inspect and install hitches every single day. Here are the five problems we encounter most often - and why each one is more dangerous than most drivers realize. ❌ Mistake #1: Using the Wrong Hitch Class for Your Load Trailer hitches are rated in classes — Class I through Class V — each designed to handle a specific range of trailer weights and tongue loads. Here's a quick breakdown: Hitch Class Max Gross Trailer Weight Common Use Class I Up to 2,000 lbs Small bike racks, lightweight cargo Class II Up to 3,500 lbs Small utility trailers, canoes Class III Up to 8,000 lbs Most campers, boats, mid-size trailers Class IV Up to 10,000 lbs Large campers, heavy utility trailers Class V Up to 20,000+ lbs Commercial loads, heavy equipment Here's where people get into trouble: they guess. They bought a truck, assumed the dealer put on the right hitch, and never thought about it again. Or they bought a used vehicle and have no idea what class hitch is on it. Or they upgraded their trailer but never upgraded the hitch. A Class II hitch rated for 3,500 lbs cannot safely tow a 5,000-lb camper. Period. The hitch receiver can crack, the ball mount can fail, and the trailer can separate from the vehicle entirely. On a mountain road, that's not just a mechanical failure - it's a life-threatening emergency. What to do: Know your trailer's loaded weight (not just its dry weight - account for water, gear, food, bikes, and everything else you're packing). Then verify your hitch class matches or exceeds that weight. When in doubt, come see us. We'll check it for free. ❌ Mistake #2: Ignoring the Wiring Harness Your trailer's brake lights, turn signals, and running lights all depend on a properly functioning wiring harness connecting your tow vehicle to your trailer. It sounds basic. It should be basic. But wiring harnesses fail more often than you'd think - and when they do, the consequences are serious. Colorado winters are brutal on electrical connections. Road salt, moisture, temperature swings from -10°F to 80°F, and the constant vibration of mountain roads all take a toll on wiring connections over time. Corroded connectors, frayed wires, and loose grounds are incredibly common on vehicles that have been towing for more than two or three seasons. What happens when your trailer lights fail? The driver behind you on a foggy mountain pass has no warning when you brake. Your turn signal disappears when you're changing lanes on I-70. Your trailer becomes essentially invisible in low-light conditions. It's also worth noting: non-functioning trailer lights are a moving violation in Colorado. Officers on mountain corridors watch for this specifically. A faulty harness can mean a ticket before you even reach your destination. What to do: Test your trailer lights every single time before you depart - not just at the beginning of the season. Have your wiring harness professionally inspected at least once a year, especially if you tow frequently or park your trailer outdoors through the winter. ❌ Mistake #3: Incorrect Tongue Weight and Weight Distribution Tongue weight is the amount of your trailer's total weight that presses down on the hitch ball. It's one of the most misunderstood concepts in towing - and getting it wrong causes some of the most dangerous trailer behaviors on the road. Too little tongue weight (under 10% of total trailer weight): Your trailer's rear end becomes heavier than the front, which causes the trailer to sway back and forth like a pendulum. At highway speeds on a mountain highway, this sway can become violent and uncontrollable in seconds - a phenomenon called "trailer sway" or "fishtailing." Once a trailer starts to sway aggressively, it can pull the rear of your tow vehicle with it, flipping both vehicles. Too much tongue weight (over 15% of total trailer weight): The rear of your tow vehicle squats down, which lifts your front wheels slightly. Reduced front-wheel contact pressure means reduced steering effectiveness and reduced braking power on the front axle - exactly when you need it most on a mountain descent. The fix: Proper weight distribution starts with how you load your trailer (heavier items forward, balanced side to side) and is further corrected with a weight distribution hitch system on heavier trailer setups. A certified technician can verify your tongue weight with a scale and set up your weight distribution system correctly the first time. ❌ Mistake #4: No Brake Controller - or a Poorly Calibrated One If your trailer weighs more than 3,000 lbs loaded, Colorado law requires your trailer to have its own independent braking system. That means a brake controller installed in your tow vehicle that activates your trailer's electric brakes proportionally to how hard you're pressing your tow vehicle's brakes. A brake controller that isn't installed properly — or isn't calibrated correctly for your specific trailer - creates two dangerous scenarios: Under-braking: The trailer brakes don't activate with enough force. Your tow vehicle's brakes do all the work. Coming down a long mountain grade, this leads to brake fade, overheating, and potentially total brake failure. Over-braking: The trailer brakes lock up before the tow vehicle's brakes. This causes the trailer to push sideways, leading to - you guessed it - trailer sway. A properly installed and calibrated brake controller is one of the most important safety investments a Colorado tower can make. It's not optional, it's not just a nice upgrade - on heavy trailers in mountain terrain, it's the difference between a safe trip and a disaster. ❌ Mistake #5: Skipping the Pre-Trip Safety Inspection This might be the most common mistake of all - and the easiest to fix. Most people hitch up their trailer, check that it's attached, and drive away. They don't check the hitch ball tightness. They don't verify the safety chains are crossed correctly. They don't test the breakaway cable. They don't check tire pressure on the trailer. They don't confirm the trailer tongue is level. Each of these checks takes less than two minutes. Together, they take about fifteen minutes. And any one of them, if skipped, could be the thing that turns a beautiful Colorado weekend trip into a roadside emergency - or worse. We've put together a complete pre-trip safety checklist at the end of this article - download it, print it, and run through it every single time before you hit the road. What a Professional Hitch Installation Actually Includes There's a big difference between buying a hitch online and bolting it on yourself — and having a certified technician perform a professional installation. At Hitch Corner, every installation includes: Vehicle-Specific Hitch Selection - We don't grab whatever's on the shelf. We look up your exact vehicle year, make, model, and trim to identify the correct hitch with the proper fit, mounting points, and rating. A hitch that fits a 2019 Ford F-150 XLT is not necessarily the right hitch for a 2019 F-150 Platinum with a different frame configuration. Proper Torque Specifications - Every bolt on a hitch installation has a specific torque value specified by the manufacturer. Under-torqued bolts loosen over time and can allow the hitch to shift under load. Over-torqued bolts can strip threads or crack the hitch receiver. We use calibrated torque wrenches on every single installation. Wiring Harness Installation and Testing - We don't just plug in a connector and call it done. We test every circuit — brake lights, turn signals, running lights, and brake controller output — with a test trailer before the vehicle leaves our shop. Written Documentation - You receive a written record of what was installed, the hitch class and rating, and any notes from the technician. This matters for insurance purposes, warranty claims, and resale value. ✅ Final Road-Ready Verification - Before you drive away, we walk you through the installation, show you how to operate any new components, and answer every question you have. You leave knowing exactly what's on your vehicle and how to use it. Who Needs a Professional Hitch Inspection Right Now? You should schedule an inspection at Hitch Corner if any of the following apply to you: • ✔️ You bought a used vehicle and don't know the hitch history • ✔️ You upgraded to a larger trailer since your last hitch installation • ✔️ Your current hitch has visible rust, cracks, or physical damage • ✔️ Your trailer lights have been unreliable or intermittent • ✔️ It's been more than two years since your wiring harness was inspected • ✔️ You've never had a weight distribution or brake controller setup verified • ✔️ You're heading into the mountains for the first time this season • ✔️ Something just doesn't "feel right" when you tow That last one matters. Your instincts are good. If towing feels different than it used to - if there's more sway, more noise, more vibration, or something that's hard to put your finger on - trust it. Come see us. We'd rather spend thirty minutes finding nothing than have you discover a problem at 65 mph on Vail Pass. Hitch Corner: Littleton's Towing Specialists We opened Hitch Corner because we love Colorado - and because we got tired of seeing drivers hit these incredible mountain roads with equipment that wasn't up to the challenge. We are not a general auto shop that installs hitches on the side. We are not a big box retailer where a seasonal employee reads the instruction sheet while installing your hitch for the first time. We are dedicated hitch and towing specialists. It's all we do, and we do it better than anyone else in the Denver Metro area. What sets us apart: • Certified towing specialists - not general mechanics • Most appointments available in 2-3 days for installations, sometimes the same day • Experience with all makes and models - trucks, SUVs, minivans, cars • Transparent flat-rate pricing - no surprises at checkout • Locally owned and operated in Littleton, CO • Hundreds of five-star Google reviews from your neighbors Whether you need a simple Class III hitch for a bike rack, a utility trailer, a full towing package with weight distribution and brake controller for a fifth wheel, or just a quick safety inspection before your first trip of the season - we've got you covered. Ready to Hit the Road with Confidence? Don't let a preventable equipment failure ruin your Colorado adventure — or worse. Two easy ways to get started: 📥 Step 1: Download Your Free Colorado Towing Safety Checklist Our technicians use this exact checklist on every vehicle in our shop. Download it, print it, and run through it before every trip. 👉 Download the Free Checklist By Clicking On The Button Below This Text 📅 Step 2: Book Your Installation or Inspection Most appointments available in 2-3 days, sometimes the same day. Certified technicians. Transparent pricing. 📞 Call or Text us directly: 303-904-1558 📍 10677 W Centennial Rd. #103, Littleton, CO 80127 🕐 Open Monday–Friday: 8 AM – 5 PM Saturday: 8 AM - Noon Hitch Corner has been serving Littleton, Highlands Ranch, Englewood, Centennial, and the greater Denver Metro area for 36 years. We specialize in trailer hitch installation, wiring harness installation, weight distribution systems, brake controller installation, and towing safety inspections for all makes and models.
Trailer Connected to Vehicle
By Joel Phillips March 28, 2026
Because not all hitches are created equal.
A white rv is parked on the side of the road.
By Joel Phillips May 30, 2025
From Wheels to Meals: Must-Have RV Supplies for Every Adventure
A black and white drawing of a chair on a white background.
By Harold Kiefer February 20, 2025
Discover the best 5th wheel hitch for dodge ram 2500 and learn about towing capacity, installation, costs, and expert solutions.
A red and white rv is parked in the snow.
By Harold Kiefer February 19, 2025
Discover top RV accessories for safety, style, and sustainability. Upgrade your camper with essential eco-friendly gear and smart gadgets.
A man is attaching a trailer to a car.
By Joel Phillips February 17, 2025
Stay safe on the road by avoiding common trailer hitch mistakes. Learn about proper hitch selection, weight distribution, and maintenance in Littleton, CO.
A close up of a trailer hitch with a chain attached to it.
By Joel Phillips February 17, 2025
Ensure safe towing with expert trailer hitch safety tips. Learn about weight distribution, hitch selection, and emergency preparedness in Littleton, CO.
A man is attaching a trailer to a truck.
By Joel Phillips February 17, 2025
Ensure safe towing with expert trailer hitch inspection tips. Learn how to check for rust, secure connections, and test safety features in Littleton, CO.
A black tow bar with a trailer hitch attached to it on a white background.
By Joel Phillips February 15, 2025
Discover expert trailer hitch wiring installation near me. Learn how to choose the right service, costs, and installation steps now!
A metal bracket with a ball on top of it on a white background.
By Joel Phillips February 14, 2025
Find top local services for Gooseneck hitch installation near me. Learn about costs, DIY tips, and professional installers.